

Konnektor

Buy

Sold out. Out of production.

Description

Konnektor
Analogue Mastering Matrix

8 stereo hardware units in your favourite order

Integrate all your hardware for sum processing with the Konnektor in your favourite order.

Full analogue signal path.

Connect up to 8 analogue stereo units.

Arrange your signal path by drag & drop inside of your DAW.

Total recall with the DAW-Plug-In

Save your settings with the plug-in in each song.

Create presets with your favourite combinations. Do you always start your mastering with the same devices? With the presets you’re ready to go!

Test different order settings by stepping the presets. What sounds better, the EQ in front of the compressor or the other way around? It only takes a second to find it out.

Build in LR->MS- and MS->LR-Matrix

The Konnektor offers additionally two analogue hardware plug-ins for LR->MS and MS->LR-encoding.

You like to make the bass mono compatible with the hardware EQ? No problem at all. Drag the LR->MS plug-in before the EQ in your signal path and the MS->LR plug-in after the EQ. Now turn the bass down in the right channel of the EQ. Done.

Now do you like to compress the mid and the side signal? Insert your compressor before the MS->LR plug-in.

Do you like the EQ after the compressor? Just move the compressor up one slot. The rest adapts automatically.

Konnektor - LR->MS Analog-Plug-in
Konnektor - MS->LR Analog-Plug-in

Upload the images of your hardware

Upload the images of your hardware into the Konnektor. Now your virtual rack looks like your studio. The images of all of our products are Pre-installed already.

Photos

Videos

Sound Demo

Konnektor - Analogue mastering matrix vs. real wiring

Features

Features

  • Controllable by the webpage of the Konnektor or by plug-in (VST, AU, AAX)
  • Analog plug-in MS->LR and LR->MS
  • Full analogue signal path
  • Digital controlled
  • Total recall
  • Minimum system requirements: Windows 10 or Mac OS X 10.7 (Pro Tools 11 and above)
  • XLR main input and output to the mixbus
  • 2x8 inputs and outputs sub D connector (XLR or TRS via cable, Tascam layout)
  • Connection by network to the DAW
  • Internal power supply

Specifications

  • Frequency Response: 10Hz - 30kHz
  • Maximum Input Level: +22dBu
  • Input Impedance: ≥10kΩ
  • Output Impedance: <600Ω
  • Maximum Output Level: +24dBu
  • Dynamic Range: ≥110dB
  • Voltage: 110-240V~/50-60Hz
  • Fuse: 500mA slow-blow
  • Maximum Power Consumption: <25W
  • Dimensions: 2U, H:132mm, W:483mm, D:250mm

FAQ

General
Download a picture of the front panel of your device from the website of the manufactur of your device. Or make your own photo.
Open the website of the Konnektor from the plugins context menu. Choose the inputs and output your device is connected to and upload that picture on the settings page.

Remove and insert the plugin again into your project and it will show the pictures of your devices.


.

.

.

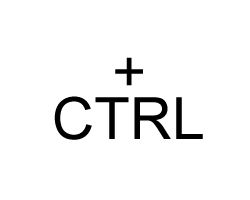
STRG + bypassThe clicked device and everything below it will be bypassed
ALT + bypassThe clicked device and everything above will be bypassed
STRG + SoloThe clicked device is activated in addition to those already switched to solo
STRG + SHIFT + SoloThe complete solo group belonging to the clicked device is switched to solo
MacOS 64-bit downwards compatible up to 10.7, Windows: all 64-bit systems
Please read our Endorsement Policy before contacting us.
Only the logo is new. Nothing else has changed.

For economic and environmental reasons, we refrained from throwing away everything with the old logo. Instead, we will replace all parts and materials piece by piece. Of course, when you buy a unit, you get the same quality no matter what logo is on the outside.
Network
The device needs a DHCP server to provide it with an IP address.
Simply set up an Internet share for your Mac's network interface.
Go to System Preferences->Shares, select Internet Sharing on the left.

At Share connection, select your internet connection (e.g. WLAN).
At With computer via: select the interface that is connected to the device.
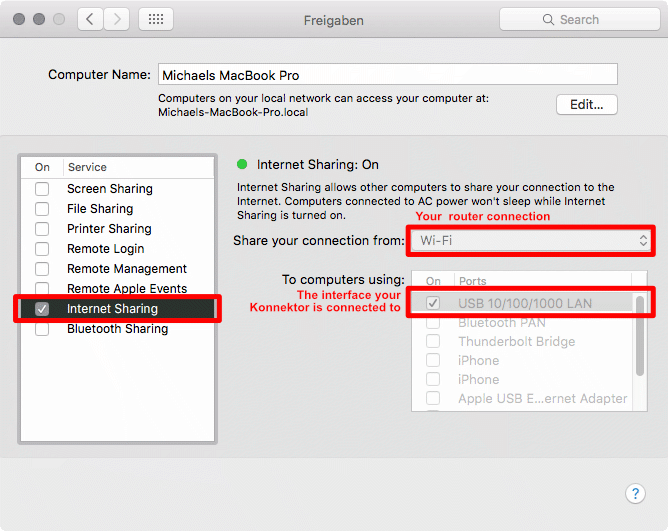

Now the device will get an IP address and will be found by the plugin.

Option 1

Use a Wifi repeater with LAN connector.
It builds a bridge between the ethernet of the device and your Wifi network.

Option 2

Connect the device via network cable to your computer and enable internet sharing.
The plugin will automatically find your connector if both are on the same network.

In the plugin you can also display the IP address and also directly call the connector's website.

The connector gets its IP address from the DHCP service in your network. This can run, for example, on your Internet router or network server. There you will find the IP of the connector in the list of assigned IP addresses.
  • Check if you have the latest plug-in version installed.
  • Windows: Add a share for your DAW(s) to Windows Defender or other firewalls or antivirus programs: https://www.youtube.com/watch?v=IDewmCvFs2M.
  • If that doesn't help, email contact@tegeler.com with the following information:
    A detailed error description incl. OS version, DAW version, Plugin version, What exactly happens after you do what?
    Please send us screenshots of your network settings if applicable (see Quickstart Network Guide).
Troubleshooting
Protools sends an empty preset to a newly opened plugin.

Right-click on the plug-in interface and check "Ignore empty presets" to fix this.
Tegeler Logo

End your inner battle between digital and analog.

© 2005-2024